Wednesday, February 27, 2013

Project House Update: Cap'n Hook


It’s Pinterest Challenge time again!

This time, I decided to tackle something I think just about everyone has probably pinned: the measuring cup/spoon organizer.


And my cabinet definitely needed it. Here’s what it looked like before:


There were three main reasons why it got to be so bad.

  1. I don’t like when cups and spoons are linked together. I like them loose so they don’t all get dirty and have to be washed every time I cook something. However, since they are loose, they roam and expand and take over everything.
  2. We have way too many. We have mine, my former roommate’s who left her’s behind when she moved out, Dan’s, and the fancy ones we received as a wedding present.
  3. I’m just lazy and throw them in the cabinet when they’re clean. No stacking for me.
Therefore, these hooks could potentially tame this beast of a shelf.

Here’s the tools I used:

  • 5 gallon paint stirrers (Ask about them at the paint desk at Home Depot, but they are free!). My cabinets are narrow, so I needed 3 to hang everything.
  • Cup hooks (Note: the reviews from these hooks claim that they aren't to the sizes specified. The coating makes the hook pretty thick while making the diameter smaller. I did have issue with a handful of my cups and spoons having too small of holes to hang on these hooks, but it definitely fit my nice ones that I wanted to hang, anyway.)
  • Measuring tape
  • Paint
  • Painter's tape
  • Wood glue (optional)
  • 3M Velcro strips
And here’s how it went together!

  • Measuring the opening of the cabinet, not the width of the door. Subtract roughly 1/2-3/4” from the measurement and mark on your stirrers.
  • Lay out the measuring cups and spoons on the stirrers. You want to make sure that the cups don’t knock into each other when they are hanging. Also, since I needed 3 layers of hooks, I put the spoons at the bottom so they are easiest to see and distinguish which size they are: 1 Tbsp, 1/2 Tbsp, 1 tsp, 1/2 tsp, and 1/4 tsp. Then, on the middle layer, I put the cups I use the most: 1 cup, 1/2 cup, and 1/4 cup. Since we have (and love) our obscure size cups, those went on the top layer: 3/4 cup, 1/3 cup and 1/8 cup. We also have a 2/3 cup, but that one’s just going to have to sit on the shelf. No more room!

  • Mark the position where you need your hooks to go based on their layout. Remember to leave some room above each hook for a label, if necessary. Also, it may turn out to be handy to make it know which side is the good side. You know, so if your husband helping and inadvertently does everything for the wrong side.
  • Cut the stirrers to length. If you want, drill pilot holes for the hooks. It will make for a cleaner final product, but it’s not mandatory.

  • Make sure to do a test run of your hooks. Because the wood is so soft and there was plenty of extra length, I wanted to test to see if there would potentially be a lot of burrs and splinters when I screwed in the hooks. If there were, I wanted to know before I paint so I could sand them off. It wasn’t too bad, but I found that the threading on the hooks was thicker than the stirrer. If you know the threaded length of the hooks you’re looking at, you could potentially avoid this problem (Note: the thickness of a 5 gallon stirrer from Home Depot is 1/4 in. The thickness of a regular stirrer from Home Depot is 1/8 inch.) Since I already bought my hooks and I really liked them, my husband came up with a different solution. He measured lengths from the scraps of stirrers the same length as the Velcro strips and used wood glue to attach them to the back of the stirrers. It means that the hooks can be fully threaded and the ends of the screws won’t damage the interior surface of my cabinet door. I will be the first to admit that it’s not the most elegant solution, but it’s just going inside a cabinet, so who cares?


  • Quick sand off the burrs.
  • Painting. We just used some that we had sitting around in the garage (Again, it’s in a cabinet, who cares?) Two coats to cover up any little bits of dried wood glue

  • Screw in your hooks.
  • Determine where the stirrers need to go on the door. Make sure to avoid the shelving on the interior of the cabinet. I like to mark of where the shelves are with painter’s tape so I don’t have to double check it a million times. 
  • Put the velcro strips on the stirrers. Other tutorials I’ve seen online just screw directly to the cabinet, but because I didn’t want to damage my “vintage” cabinets and these aren’t that heavy, 3M Velcro strips work just fine.
  • Peel the paper off the back of the velcro (while stuck to the velcro on the stirrer) and stick stirrers into place. 

  • Label your hooks. (I still need to do this, but I will at some point, promise!)
  • Hang your cups and spoons!

Isn't it gorgeous? Once I get around to labeling, I'll know exactly how to find what I need. My husband, being the engineer he is, is already trying to find ways to better the system. And good thing I used velcro strips because he's been moving them around.

Not that I mind because the shelf still looks like this:


I did manage to get rid of one set of cups, but somehow, there are still more than I remember. Oh well. At least I can find things now.

Thursday, February 21, 2013

Snow Day!

Snow is the most magical thing imaginable! Anyone who lives in a climate where it's just normalcy may disagree, but for this desert rat, it is utterly gorgeous.

Yesterday, the browns and tans of Tucson became clean and white. And more importantly, I actually got to witness the transformation with my own eyes. Yes, snow has stuck on the ground in Tucson in my lifetime, but it always happens overnight when the temperature is low enough to give snow a chance.

For the first time in my life, I stood outside, stuck my tongue out, and got a frozen face of some fluffy foreign substance.

Snow may now be officially my favorite thing ever.

I ran outside after my noontime conference call to see if my coworker's were exaggerating how much it was coming down.


My manager, being the awesome guy he is, declared it a Snow Day and gave us all his blessing to work from home to avoid the craziness of Tucson drivers before they get even crazier in the snow. I ran to my car not long after to find it had gained a chilly skin.


I didn't know how to get the snow off my window (rolling the window down and hoping it popped off was a VERY bad idea) so I drove home like this:


Once I got home, our backyard was so pretty! There's usually a lovely view of the mountains under that cloud of snow.


I brought some of it for the cats to enjoy, too.


After that, the snow started to melt and I thought that was the end of my first real snow day. That's why I was quite surprised when I finished up my run on the treadmill this evening to find this:


The snow was back! Two instances of the snow sticking to the ground in the same day? That is unheard of in these parts!

I hope I get to wake up in the morning and see the snow still waiting for me.

Monday, February 11, 2013

Color Me Rad Run

Sunday morning, my mom and I started out like this:


and ended up like this:


It was a fun run and we ran the entirety of the 5K, but it was a tough run. There were five different color stations, both dry dye and wet. {Sidenote: I'll have more photos to update in a couple of days once the official race ones are posted online.}

I'm glad we did it, but I don't know if I'd do it again. The $50 registration fee, the fact that the shirt that came in the packet was black so I had to buy a different white shirt to stain, and the fact that the packet pick-up was about an hour drive away means that "Color Me Rad" isn't high on my favorites list. I've heard that "Color Run"s are better, though, if you are looking into running one.

As I said before, it was a "5K", but it felt like much longer. So, I plugged the route into Google Maps and guess what? It was 4.1 miles, not 3.1. I can officially run 4.1 miles! That's insane! One step closer to my next goal of running a 10K!


At least I can cross it off my resolutions list!

Monday, February 4, 2013

Project House Update: Front Room Part I


Hopefully there won't be too many "Part"s to this room, but, there may. We have already hit a pretty big speed bump breaking just painting into two parts.

Let's start at the beginning. Once we knew what kind of color we wanted for the front room, we started trying to develop the exact shade we wanted. Dan mixed the two samples together at different ratios and painted it both on the wall and a scrap of dry wall.


We ended up with the second lightest shade. We've learned the hard way that colors always look darker once a whole room is that color, we played it safe. Since we mixed it, we get to name it, and it's called "Sea Glass Storm". Dan calls it gray. I call it green. Either way, it's gorgeous.

A trip to Home Depot and three gallons of paint later, we dove in. First, we painted the ceiling. Polar Bear like all the other ceilings in the house. Here's what it looked like before:


And after:


It always feels so much better once we've started painting a room. It's so much cleaner and prettier with just that small change.

Then, we painted one wall at a time. Starting with the largest, least-edging wall, we made really good time of it.


Since the rest of the room didn't actually have too much painting surface (once you subtract out the fireplace, the window, and the doorway), we decided to paint the remaining walls in one go. It was going to be awesome.

Then, bum bum BUM! Disaster struck! While taping off the ceiling, Dan found evidence of termites. TERMITES! Every Arizona home owner's worst nightmare.

Downside: we have termites. Upside: we were already working on the room so anything necessary to kill all the damn little bugs won't wreck all our work. If they need to punch a hole in the wall to fill it with poison, no problem! And all the baseboards were already removed, so if they need to get at the foundation, easy access!

Because it looked pretty isolated to one corner of the room, we just painted the other walls.


We'll finally get to finish up the walls once Terminix shows up and does their job. [Sidenote: God, I hate Terminix. Before we purchased the house, we had a separate inspection just for termites and they actually missed the termites. Dan actually found termite damage days before we were supposed to sign all the papers. The former owners were then required to tent the house, which, in turn, almost pushed back our move-in date. All of this during monsoon season, so the tent actually BLEW OFF THE HOUSE at one point. Word to the wise: don't trust Terminix. Learn how to spot termites in your own home. We basically use them as termite insurance.]

But, on the bright side, we did finally agree on a ceiling fan! I doubt we've debating anything as much as we've debated this fan. We debated number of blades, size, type of light fixture, metal color, blade color, you name it. I went back and forth on how I wanted the room to feel. Eventually, the best way to describe what I was looking for was a ceiling fan that you would have found in Indiana Jones' study. I wanted it to be classic and vintage. Dan was insistent that it be five blades. I needed an enclosed light fixture, but it still needed to be very bright. Dan needed it to be big and for the light bulbs to be straight-forward. This is the fan we walked into Lowes and instantly fell in love with it.


It's the Saratoga fan. It's oil rubbed bronze with deep cherry blades and a bright light kit. We love it. It's bright and quiet and just awesome.


So far so good. Next on the plan is to hopefully finish up the walls soon. After the termites are treated, there's some drywall that needs to be placed, but after that, painting should go really quickly. From there, tiling the base of the fireplace, tiling the fireplace itself, and building a new mantel! That's going to be a lot of hard decisions and hard work, but there's no way it won't be beautiful!

Thursday, January 31, 2013

Happy Birthday to Me!

Yep, I'm now officially 26. Just typing that makes me feel old. It's hard to deny being an adult when you're 26.

Anyway, I had a very nice birthday. It was actually very similar to last year's. I took the day off from work and slept in [All birthdays should fall on a weekend, I'm just sayin']. Woke up to a huge breakfast my husband had left for me full of danishes, cinnamon rolls, mini muffins, and juice. Then, some lounging in pajamas until my mom picked me up for a movie.

We'd been talking about seeing the final Twilight movie for months and finally got to cross it off the list. It was funny, though. My mom looked up the move times and actually got the theater wrong. We thought it was really quiet, even though it was a Wednesday morning. We then dashed across town to the correct theater with time to spare.

What do you do when you're the only people at a Wednesday morning matinee? Why, take silly pictures, of course.


Actually, by this point, other people had come in, but why should I care?

I finished out the day with a long run, an even longer shower, a delicious dinner of pizza rolls and birthday cake, and a couple of small presents from Dan.

Most of my birthday celebrating was actually done over the weekend. On Saturday, Dan and I went to Target, a thrift store, lunch at Trail Dust Town with my parents and sister, Trader Joe's, Home Depot, saw "Silver Lining's Playbook", went to the mall, had dinner at Little Anthony's, bought a ceiling fan for the living room from Lowes, and stopped at Culver's for dessert. Busy, busy day.

Sunday, we celebrated with my family. I had control of the remote control (CABLE!!!!!!!) and got to pick where we went for dinner. We fattened up at a Chinese buffet. Then, presents! It was a good year for presents. My dad stopped by our house earlier that morning to take a portrait of us in front of our house and he had it framed. My mom knitted me a scarf and gave me a pretty pink crystal necklace. My sister actually got the artist of 'Cat vs Human' to draw a portrait of our little family (I neeeeeed to take some pictures of it, it's so cute!). I asked Dan for a bag of tools for work and he really came through. I have no reason not to be handy now. That and a copy of "Love Actually", which we watch every year at Christmas time. I actually walked down the aisle to a song from "Love Actually"...

Anyway, good way to start off hopefully another good year!

Tuesday, January 29, 2013

The Best Disappointing Basketball Game

Way back in November, for Dan's birthday, he received a pair of University of Arizona basketball tickets. Since the season hadn't started yet, we waited over two months. We checked the date on the tickets over and over again, just to make sure we didn't space and miss it.

Last week, Dan and I took in a yummy Mexican meal in South Tucson before heading to the game. You know what made the game much more exciting? It was a white out!


Evrybody who's anybody wore white. Except the really cool people in the student section who wore costumes. Like watermelon man. And Gumby.

In spite of the exorbitant school spirit, it had to be almost the worst game I have ever seen. The only time we ever had the lead was in the first seconds of the game when the U of A was fouled and the score was 1-0. I think we were down 17 points at one time.

But we still managed to have fun. Dan can make anything fun. One of the things I love most about him. So, between his attitude and the mini-blimp, it was still a great way to spend an evening.

Wednesday, January 23, 2013

Cats with Hair

Sometimes, I wonder what my cats would look like with long hair. I don't know why. I just do. In spite of the fact that they're boys, I think my cats could pull off some flowing tresses.

Well, I finally got bored enough to actually see how it would look. No, I didn't purchase tiny wigs. I just put some of their pictures in one of those online hair stylers.

I always pictured Sam with a little bob, kind of like Uma Thurman in "Pulp Fiction". The closest I could come was Katie Holmes.


And for Rusty, I really pictured him some fabulously feathered 70's layers, like Donna from "That 70's show". I settled for some Julia Roberts long layers.


Am I the only one whose brain thinks about things like this?

Monday, January 21, 2013

Best. Prize. EVER!

At trivia last Thursday, I won the email bonus question!

Basically, they email out a question the day of trivia and you're allowed to look up the answer online. You write it down and it kind of becomes a big raffle. Mitch, being the nice guy he is, looks up the answer and shares it every week.

Well, this week, I won! And as I ran through the restaurant like a crazy lady on the "Price is Right" to see what my prize was, I never expected it to be something this cool.

Image Source
It's a tote bag made from recycled Japanese grain bags! And it's covered in cartoon marshmallows! The big one is named "Marshall" and the little one on the left is a freaky, little cannibal, toasty a marshmallow on a stick, much to the chagrin of the puppy in the center.

I don't think I've ever been this excited about anything ever.

Thursday, January 17, 2013

Project House Update: Guest Room

In a post that's been meaning to happen since before Thanksgiving, we painted the guest room! Actually it's been meaning to happen since roughly March 13th, 2012, when we painted samples on the wall. We actually finished painting the room the night before my in-laws came to stay with us for the holiday. It still smells like new paint, so I can't imagine how much it must have stunk while they slept in it months ago.

Here's what the room looked like before we moved in.


And here's the best before picture I could come up with (I swear I took a bunch of "before"s. How do I always forget?)


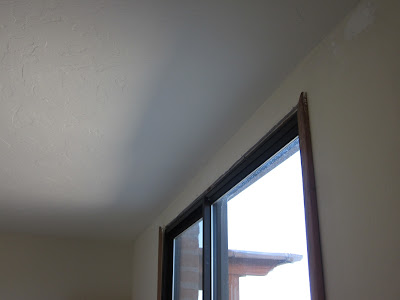
It wasn't too bad, but it was like every other room in the house: the walls were beat up and never cleaned up. Also, like the master bedroom, there was the problem of the fixed reading lights over the bed. Additionally, the ceiling fan with a chain was bugging the crap out of my husband.

My husband, being the smart man he is, ran the wire for the fan waaaay back in June when the roof was redone. Then, he patched over the holes where the reading lamps used to be. My one handy job was to spackle and sand because it is my one skill. I can make a patched piece of drywall look invisible. (Sidenote: I don't know if this is how it is all over the country, but in Tucson, ALL drywall is textured. It's not that noticable, but it is a huge pain in the ass when trying to fix up a house. Another step in the drywall process that most people just can't do by themselves.)

Finally, we sanded away the sides of the paint samples and began painting. We chose Behr's "Silver Drop" for the walls and the ceiling is "Polar Bear", like every other ceiling in the house. The results are subtle, but really gorgeous.


Still haven't found the right place to hand my ticket box.
Also, like every room we redo, we installed a new ceiling fan. We really liked this fan, but we couldn't decide if it should go in the guest room or the formal living room. We pulled the trigger and, if we didn't like in the guest room, we could always move it to the living room. While it's a lovely fan, it does not give out much light. Very little light at all. With the bulbs that you are supposed to use for the fan, it was basically pathetic. It barely lit the small bedroom, let alone the much larger living room. Dan was determined so he switched out the fuses for the large ones and then threw in some much brighter bulbs (Sidenote: I'm not recommending you try this at home. Dan is very good electrically, so I trust his judgment on this one. That and I am as determined as he is to make this fan work.) He broke one bulb in the process, but while waiting for the second bulb to arrive from Amazon, one bright bulb is better than the two small, dimmer ones.


While the paint and fan upgrade make the room much more livable, there still a bit to go. Here's what's left to do on this room:
  • Hang curtain rod, curtains, and new blind blades. I've mentioned before how much of a pain the curtains in the master bedroom are being. This room is no different, EXCEPT that we knew it would be before we painted. Dan came up with an alternative solution to cram in curtains: move the blinds down. Before painting the room, he removed the trim around the top of the window. 
  • Then, he notched out a couple of strategically placed groves in the back of the trim for the mounting brackets for the blinds. He left everything off the wall while we painted, then he mounted the blinds brackets lower, reinstalled the trim, and hung up the blinds. 
  • For the moment, we cut a bit off of the bottom of the existing blinds and hung them up. When the mood strikes, we'll go to Home Depot and buy some sparkly clean new ones. Once we're past all of that, we'll tackle curtain rod and curtains.
  • Refinish headboard. We inherited the bed frame and while it works well, it just looks like it belongs in a B & B from the 90's. But I have a plan! Some strategic cutting with a Dremel, some finials, and a good coat of paint.
  • Hang some art. Dan's got a big old world map that I think could work well over the bed. Only problem? It's second hand and the frame is broken. Been broken for 2+ years and has yet to be hung on a wall.
  • Finish turquoise night stand. Waaay back when, I found this end table for $15. I painted it turquoise and it looked great. But now, months later, it's starting to get a bit beat up. So, I've decided to give it a coat of sealer. I'll get to that...someday. That and put Christmas presents away...
  • Refinish half-moon night stand. Another inherited item that has seen better days. I need to figure out how to give it a new top or finish it or something. I like the look of it, but it's been my end table since I was about, oh, 6 years old, and it looks its age.
  • Figure out what to do with the pink love seat and furniture arranging. I will be the first to admit that the room isn't laid out very well. I'd like to find a new chair to replace the pink loveseat (as seen above), another inherited item. Some day, we'll have to figure out a better lay-out so we can fit in things like a dresser and some more storage, but we'll worry about that later. 
That being said, when this room is "finished" it'll feel something like this: